How to Backsplash Around Kitchen Window | Just in 8 Steps
The kitchen is an essential room in a home, and a backsplash around the kitchen window is an integral part of it. So if you’re looking to create that perfect look for your kitchen, this guide will help you out.
We’ll cover what materials are needed and how to cut and install them. We’ll also talk about some design tips to make sure your backsplash looks impressive.
What you’ll need?
Here is a list of what you’ll need in order to install a backsplash around your kitchen window:
- Tile
- Caulk
- Grout
- Sponge
- Chalk line
- Tape measure
- Level
- Pencil
- Tile nippers (or a wet saw)
- Tile adhesive
- Notched trowel
- Cotton swabs
- Clean cloths
- Soft scrub brush (optional)
How to Backsplash around Kitchen Window like a Pro?
There are a few things you need to do in order to backsplash around the kitchen window like a pro. Here’s what you need to do:
Step 1: Measure the Area and Mark the Walls
The first step is to measure the area where you’ll be installing the backsplash. Use a tape measure to get the length and width of the area, and then mark the walls with a pencil. It’s important to be as accurate as possible to avoid ending up with too much or too little material.
Step 2: Prep the Walls
Once the area is measured and marked, it’s time to prep the walls for installation. Start by cleaning the area with a damp cloth to remove any dirt or debris.
If there is any old caulk or grout around the area’s perimeter, use a soft scrub brush to remove it. Once the room is clean, use a level to make sure the wall is level, and then uses a chalk line to mark where you’ll be cutting the tile.
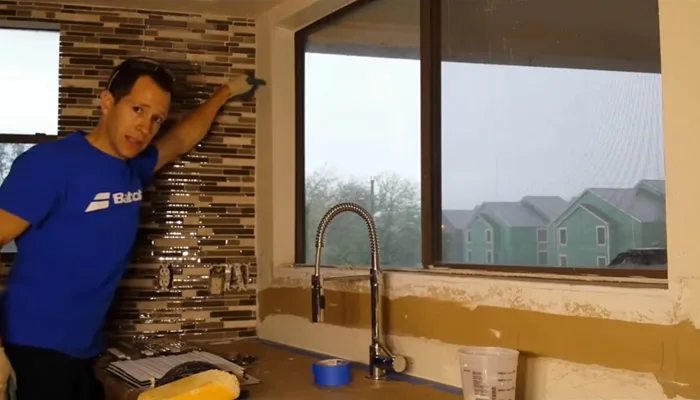
Step 3: Cut the Tile
The next step is to cut the tile. Set it up according to the manufacturer’s instructions if you’re using a wet saw and then make your cuts. If you’re using tile nippers, score the tile along the line you marked with the chalk line and snap it off.
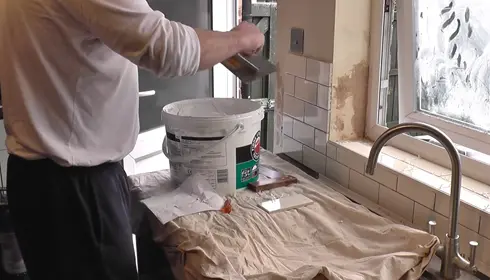
Step 4: Apply the Tile Adhesive
Once you have your entire tile cut, it’s time to apply the adhesive. Start by mixing the tile adhesive according to the manufacturer’s instructions. Once mixed, use a notched trowel to spread it onto the wall in an even layer. Be sure to work in small sections so that the adhesive doesn’t dry before you can apply the tile.
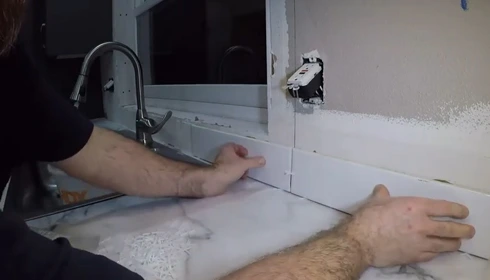
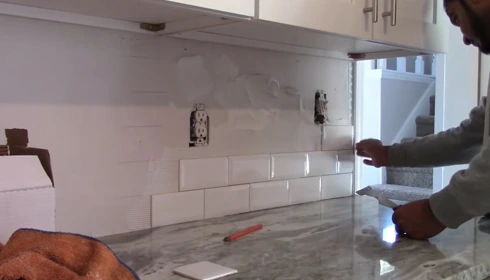
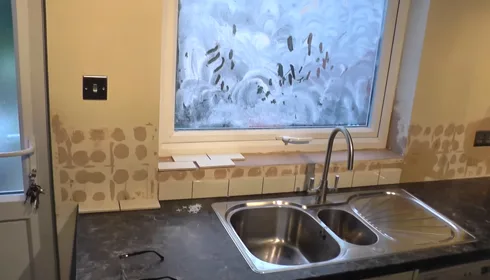
Step 5: Apply the Tile
After the adhesive has been applied, it’s time to start laying the tile. Begin in one corner and work your way across the wall, pressing the tile into place. Use a level to make sure each row of tile is level as you install it. If you need to cut any pieces to fit around outlets or other obstacles, use a tile nipper or wet saw to make the cuts.
Step 6: Apply the Caulk
After the entire tile has been installed, it’s time to apply the caulk. Use a caulking gun to apply a bead of caulk around the perimeter of the backsplash. Be sure to smooth it out with your finger to be even.
Step 7: Apply the Grout
Now apply the grout. Start by mixing the grout according to the manufacturer’s instructions. Once mixed, use a sponge to apply it over the tile. Be sure to work it into all of the joints to avoid air bubbles. Once the grout has been applied, use a clean cloth to wipe away excess.
Step 8: Enjoy Your New Backsplash
Once the grout has dried, your new backsplash is complete. You can now sit back and enjoy your handiwork. Be sure to clean it regularly with a damp cloth to look its best.
Tips for Designing Your Backsplash
Here are a few tips to keep in mind when designing your backsplash:
Keep it Simple
A backsplash is an excellent opportunity to add visual interest to your kitchen, but you don’t want it to be too busy. Choose a tile that has a clean, straightforward design.
Choose a Neutral Color
A backsplash is not the place to experiment with bold colors. Choose a neutral color that will complement the rest of your kitchen.
Consider the Size of Your Tiles
The size of your tiles will significantly impact the overall look of your backsplash. Smaller tiles will create a more delicate look, while larger tiles will make a statement.
Use a Matching Grout
For a seamless look, use a grout that matches the color of your tiles. This will help to create the illusion of one continuous sheet of tile.
Don’t Forget the Details
The finishing touches are just as important as the tile itself. Be sure to choose trim pieces and outlets that complement the tile.
Consider Professional Installation
Installing a backsplash is not a challenging DIY project, but it is time-consuming. If you don’t feel confident in your ability to do it yourself, there’s no shame in hiring a professional.
Why Do You Need To Backsplash Around The Kitchen Window?
1. It’s Practical:
A backsplash is the first line of defense against spills, splatters, and stains. It protects your walls from damage and makes cleanup a breeze.
2. Hygienic:
A backsplash provides a barrier between your foot and the wall, which helps to keep your kitchen clean.
3. Heat-Resistant:
A backsplash protects your walls from heat damage. A backsplash is a must if you have a stovetop or range hood.
4. It’s Stylish:
A backsplash can add a touch of style to your kitchen. It’s a great way to experiment with color and pattern without going over the top.
5. Easy To Clean:
A backsplash is easy to wipe down, which keeps your kitchen looking clean and clutter-free.
6. Affordable:
A backsplash is a relatively inexpensive way to update your kitchen. You can DIY a backsplash on a budget or splurge on high-end materials.
FAQs
Can I Tile My Kitchen Myself?
If you are confident in measuring, cutting, and installing tile, you can undoubtedly tile your kitchen yourself. However, if you are not confident in your abilities, it is best to hire a professional.
What is The Best Type of Tile for a Backsplash?
The best type of tile for a backsplash is a matter of personal preference. However, some popular choices include glass, ceramic, and stone.
What is The Best Way to Clean a Backsplash?
The best way to clean a backsplash is with a damp cloth. You can use a mild soap if necessary, but rinse it off afterward.
Conclusion
Backsplashes are a great way to add visual interest and protection to your kitchen. Whether you mix up the grout yourself or hire someone else, they’re an affordable update with many benefits. We hope that this article has helped show how easy it is to design your backsplash. Thanks for reading.